
Ever have one of those clients that just won’t give you a moment to yourself and is literally looking over your shoulder and breathing down your neck? Let me tell you about my bathroom remodel for Percy.


I started working for this client last year and I thought they were a cool cat, to borrow a phrase from the 60’s. Little did I know what they, and their house, would have in store for me. The plan was to completely gut and rebuild the bathroom (as well as the kitchen, but we’ll get to that another time) including a new floor, wall cover, vanity, shower, door, and more. I was excited! I love a complete refresh of a room because we get to design everything to work together. I wasn’t expecting the client to be hanging on me.

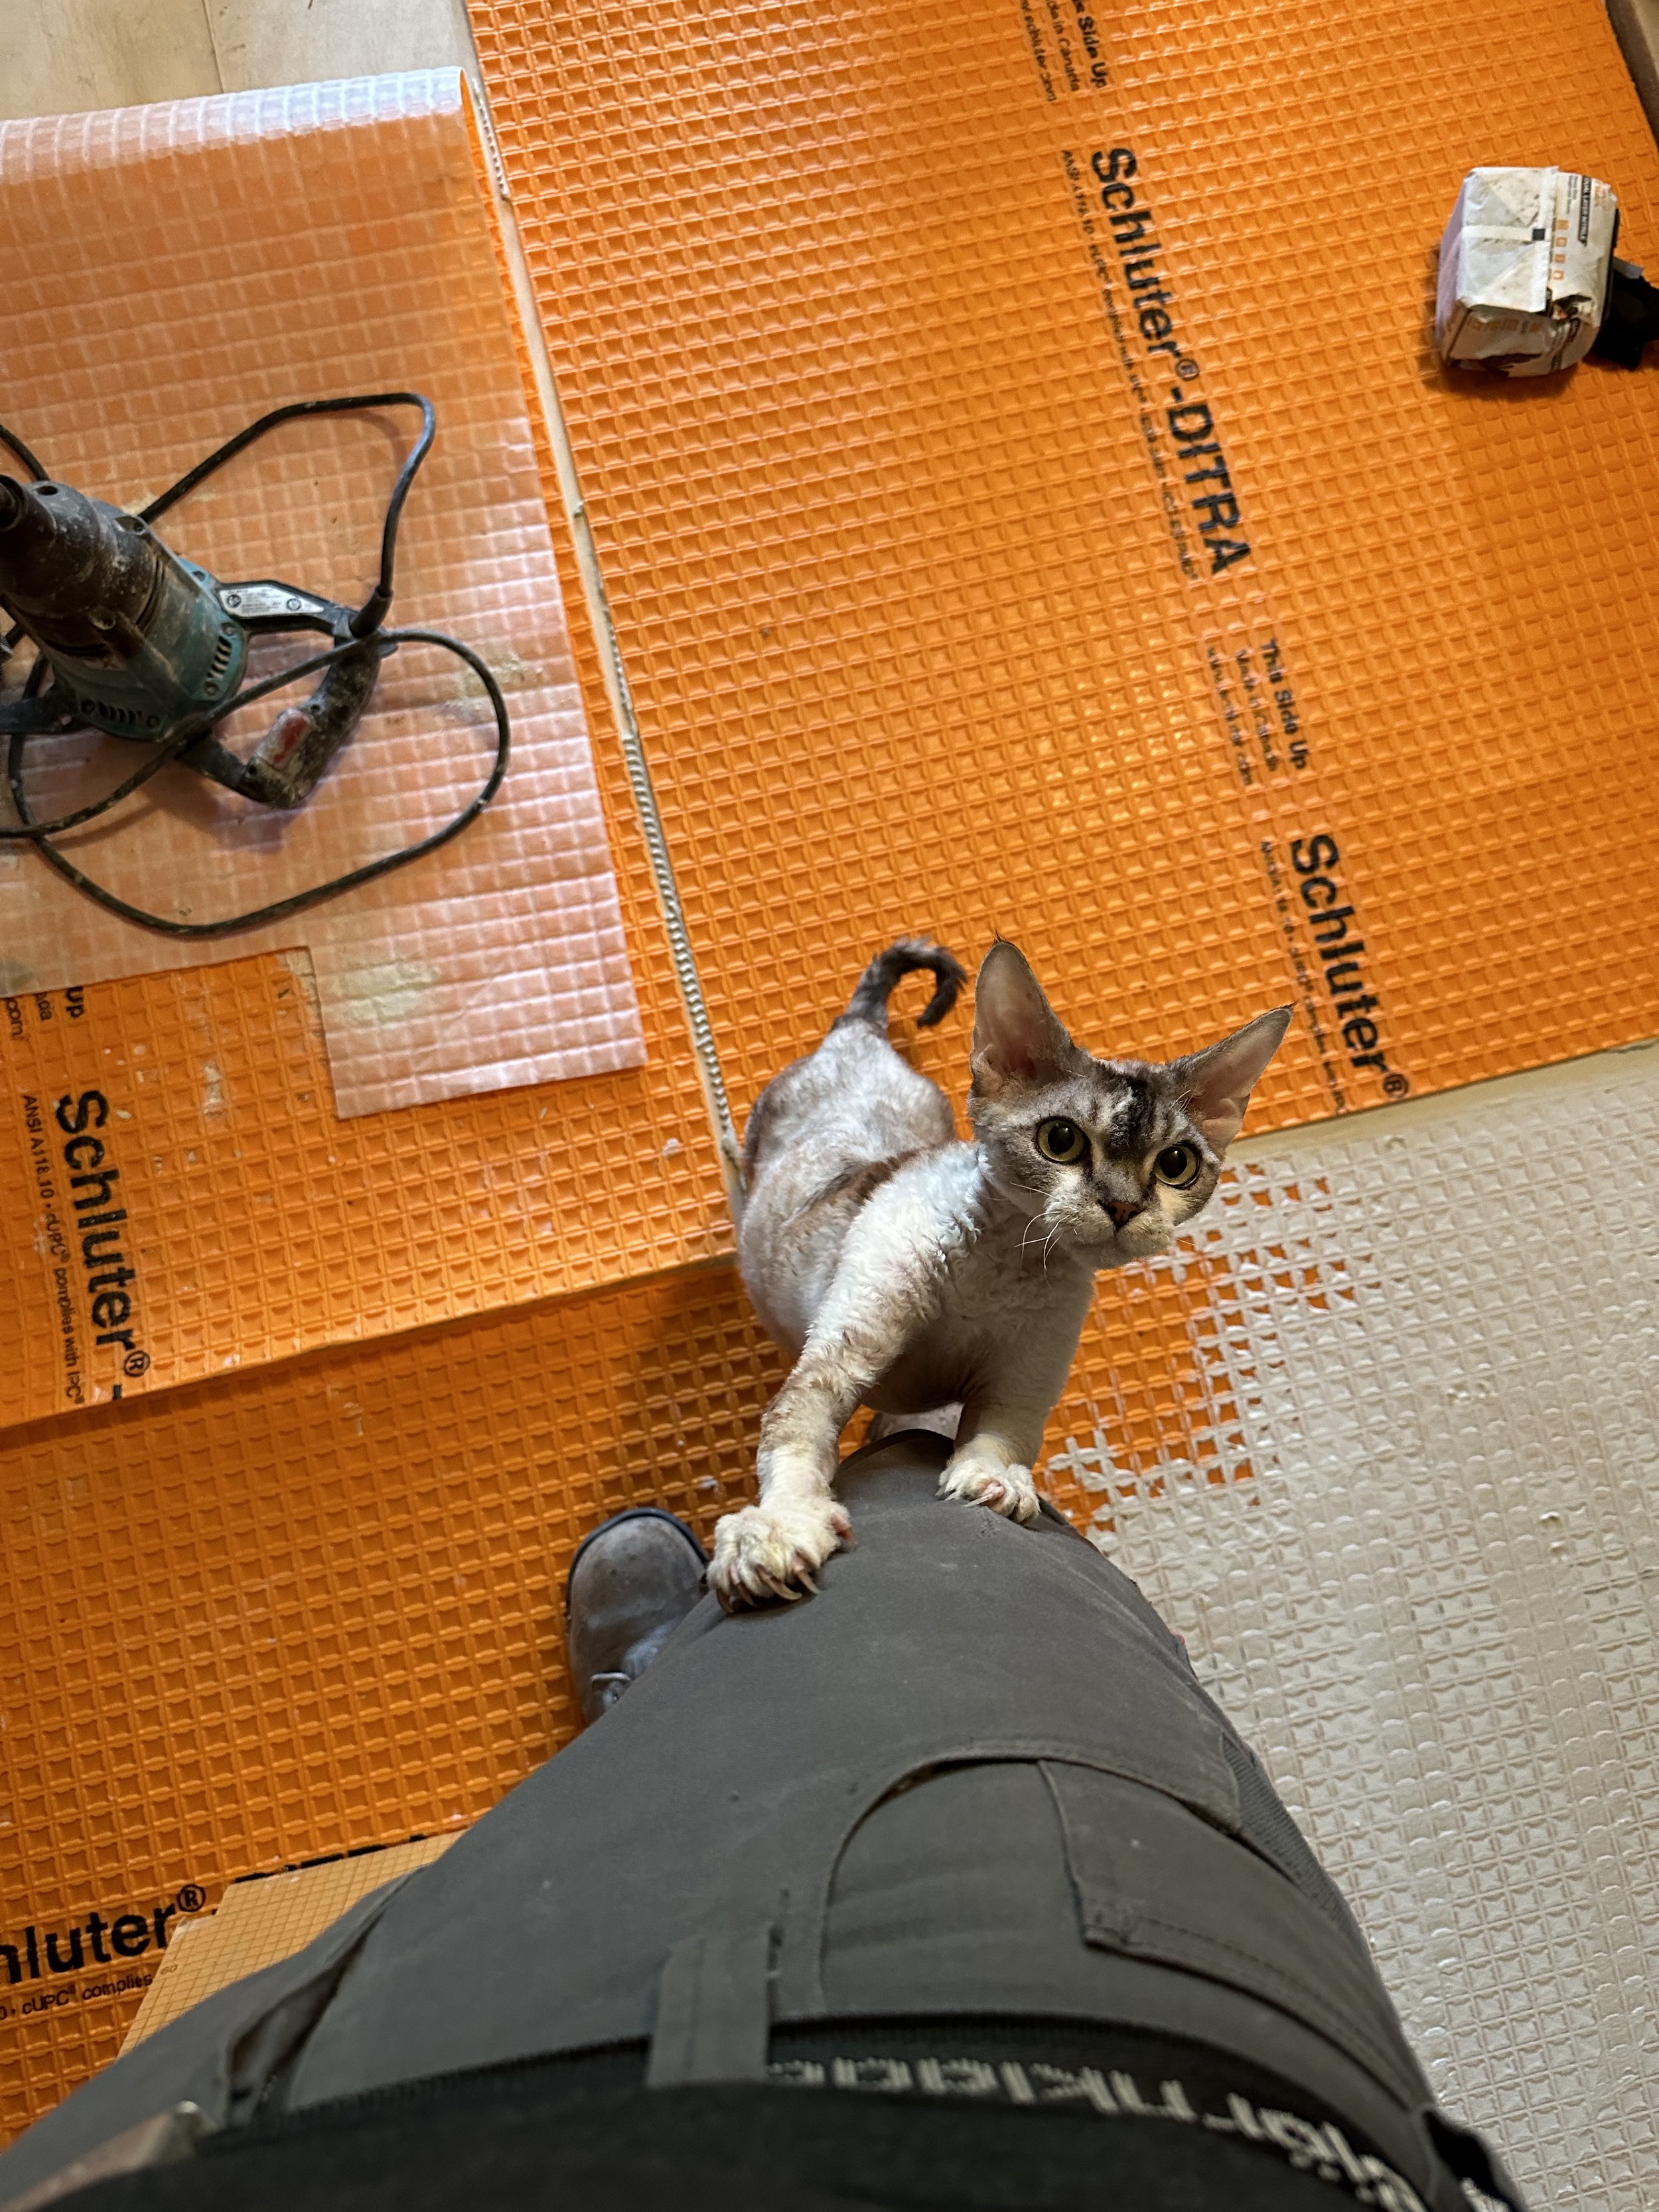
When I could get a moment to myself and dive into the actual work, I found some really fascinating previous work on this house. I took the drywall off the exterior wall of this bathroom and, well, I don’t know where to start. The framing is all over the place, there’s a mixture of insulation types, there are massive holes that just let clear airflow through, and, the highlight, there was no bottom plate to the wall. You can see in this photo that the framing has no 2x4 laying horizontally at the bottom of the framed wall. The wall studs are just hanging in midair. I don’t know if it was removed, or it was never there. It’s baffling. After remodeling homes for 15 years and being in the industry twice as long, I’ve sen a lot, and every time I think I’ve seen it all, I get a brand new surprise. Lucky for me, I love surprises! Like when Percy here won’t get off my back about the work to be done in this bathroom remodel.
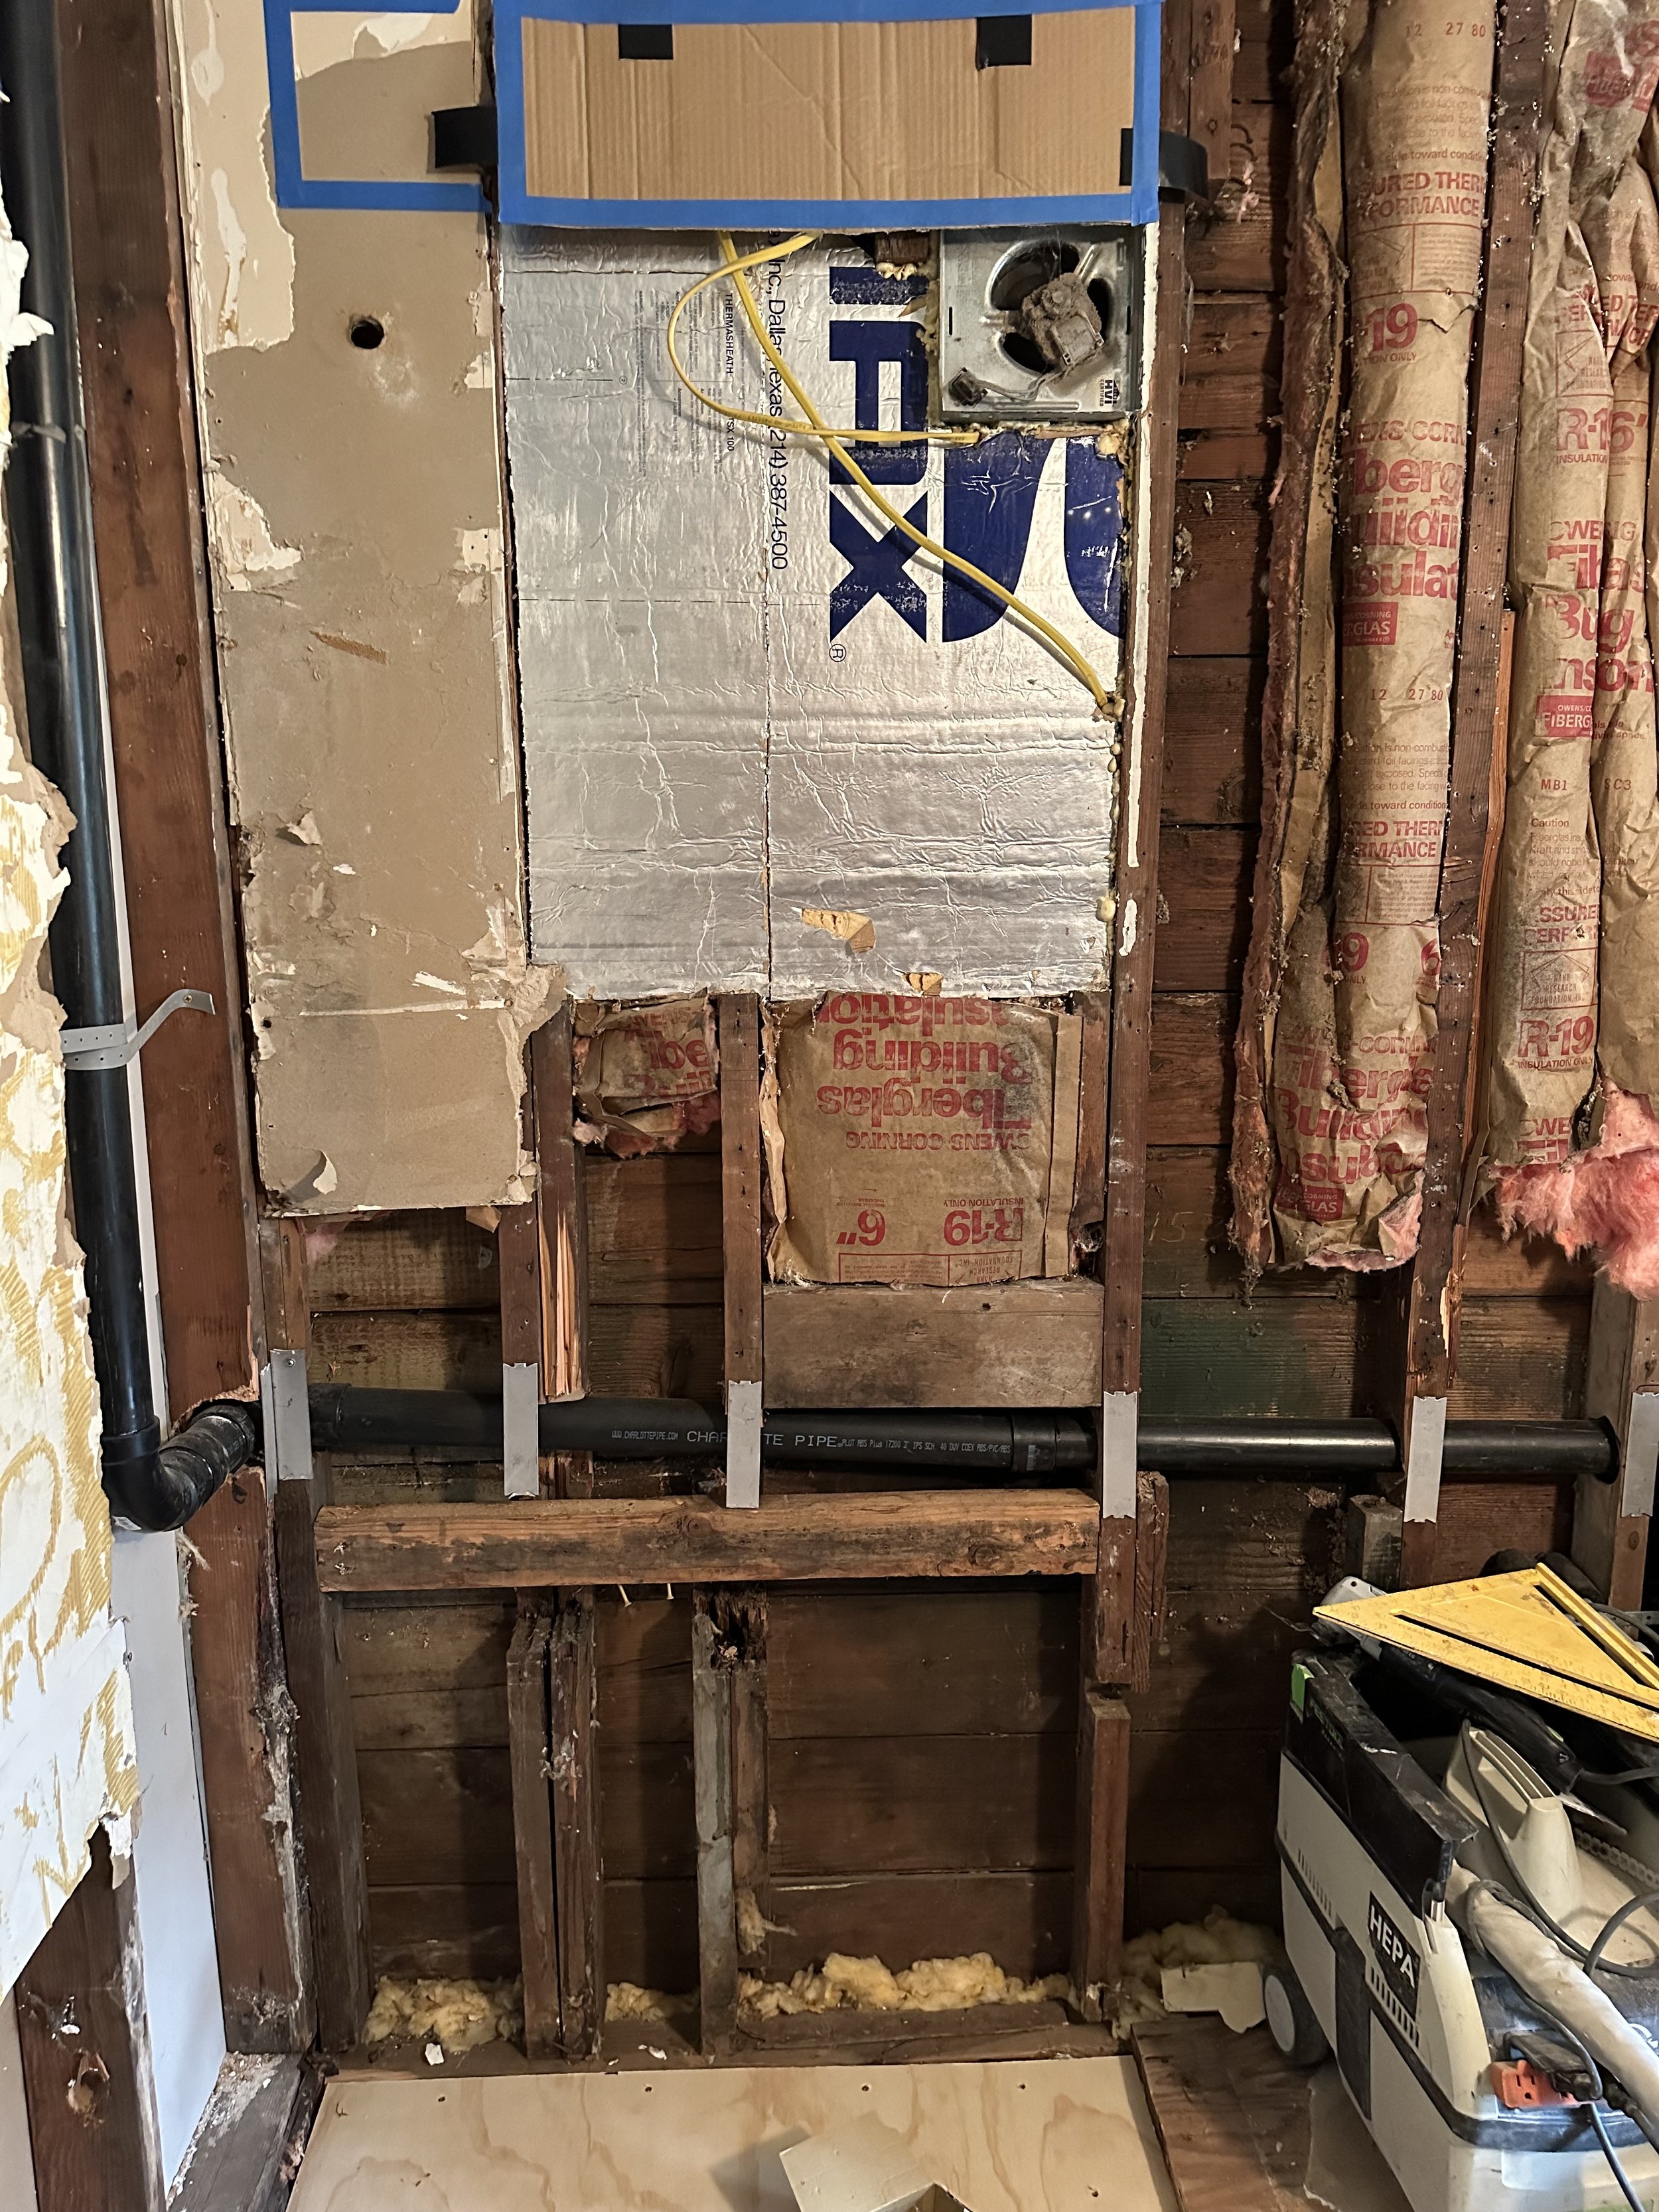
No bottom plate for this framed wall, if I can even call it framed. Studs have massive portions cut out and rotten away. Major areas of insulation are missing or squished. This wall was a mess.
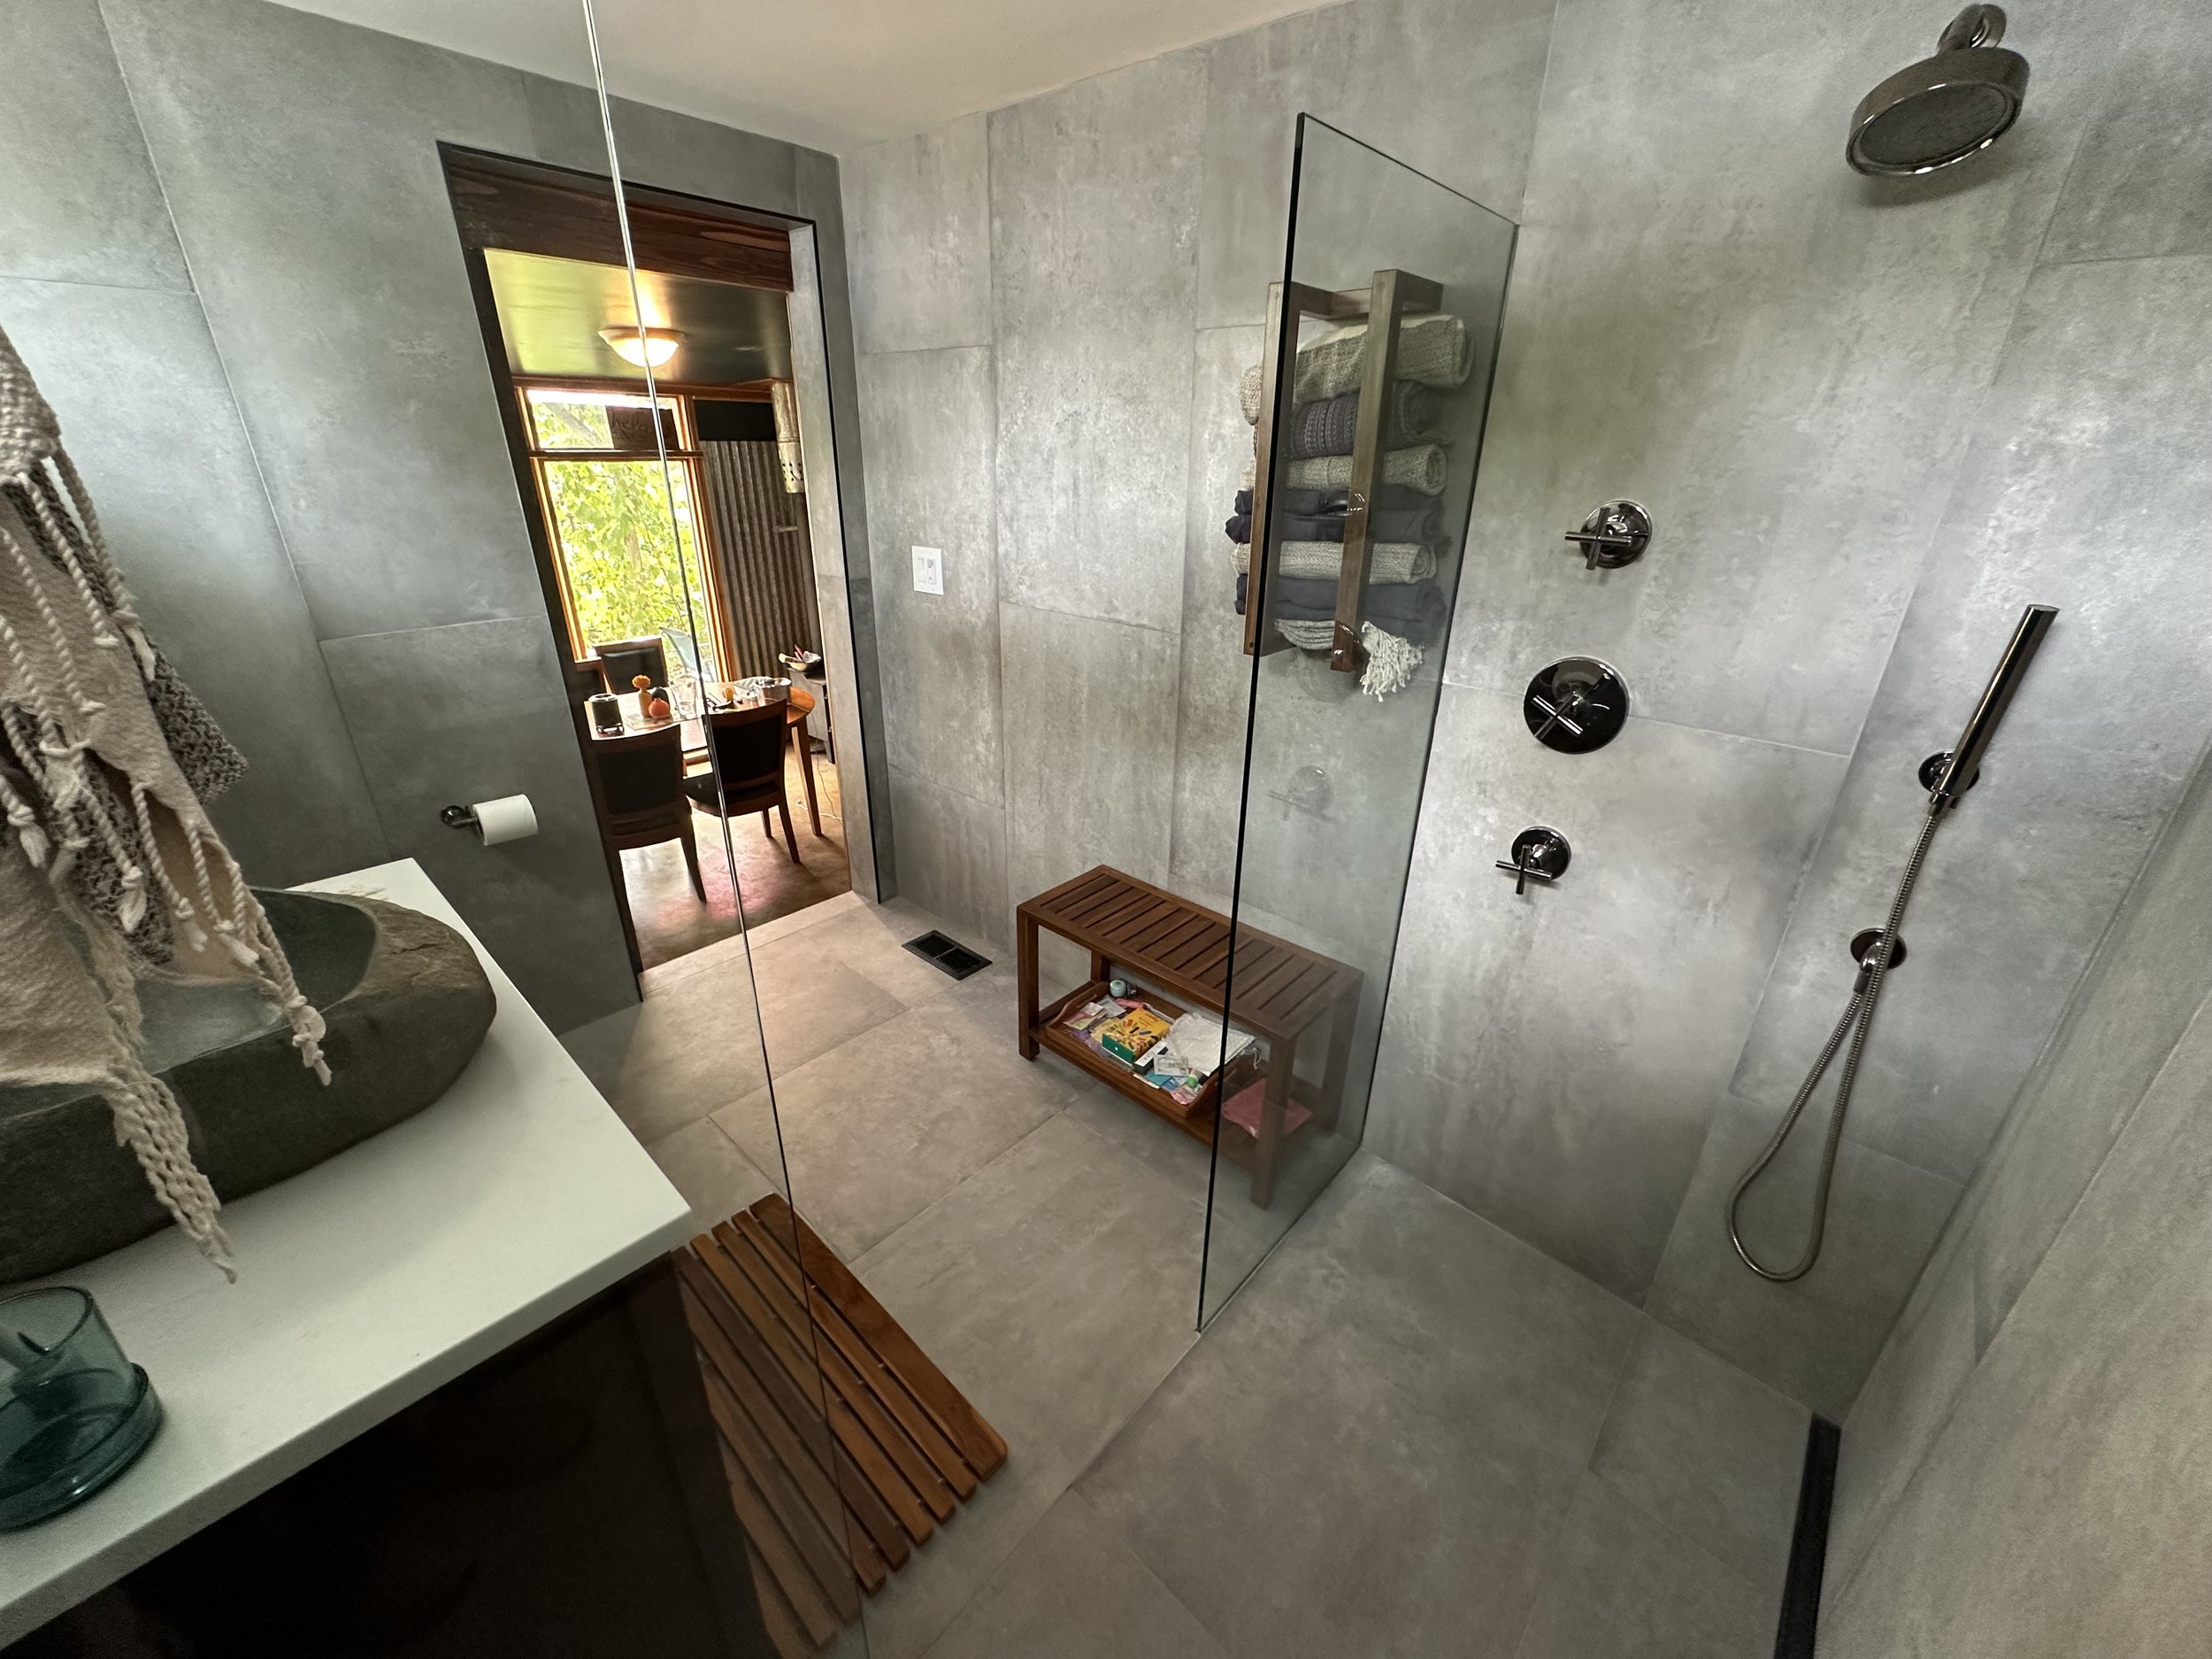
After I repaired the inner workings of the walls, filled the insulation, ensured proper plumbing and electrical installations, and the rest of it, it was time for the fun bits: putting it all together. I waterproofed the room from floor to ceiling to prepare for the 2 foot by 4 foot tiles to be installed on the floor and walls. The entire floor sloped down to the linear drain in the shower. The new door was barn-door style, and slid through a track cut into the steps leading into the bath for stability and a smooth, secure glide.

Before. Obscured window for light from sunroom.

After. New barn door and steps up into the bathroom, instead of the entry being in the kitchen.
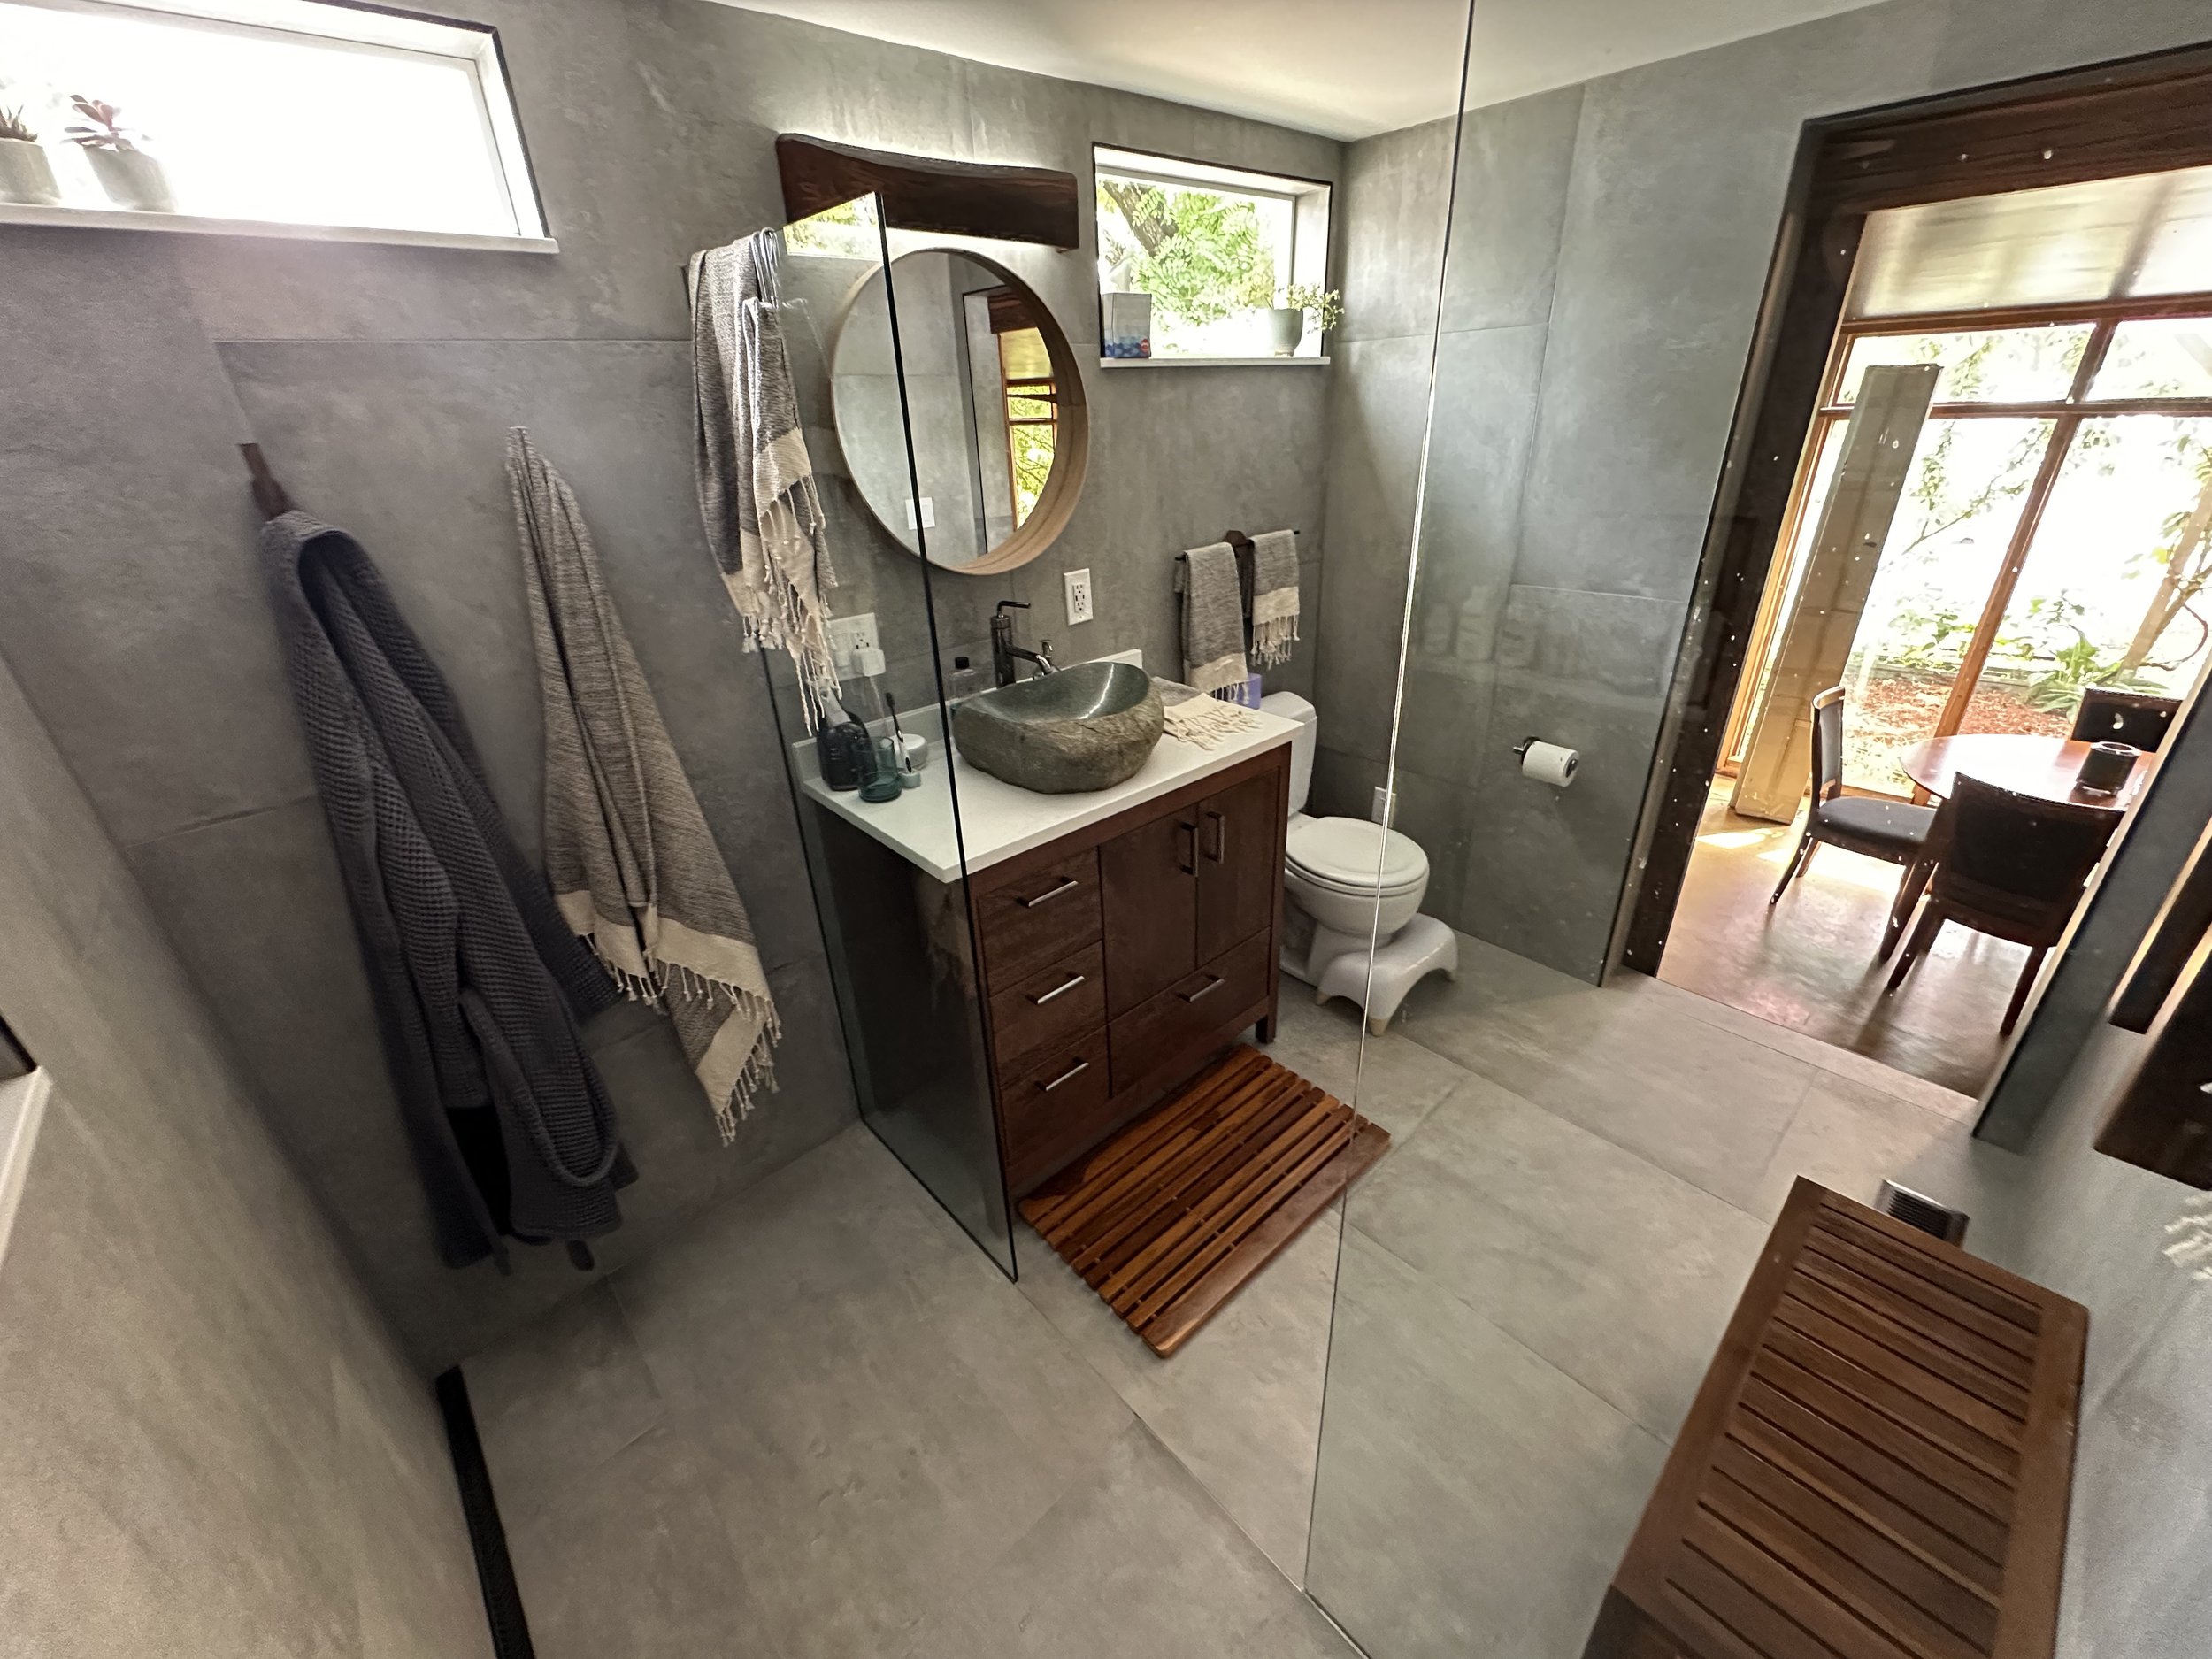
The toilet stayed in the same place, but we moved the vanity so that we could also move the door into the bathroom which was to make the shower bigger but also get the bathroom door out of the kitchen. We added glass partitions with no door for an open shower. Two windows were added for natural light, and a new Panasonic Whisper Recessed bath fan was added for quiet humidity extraction. Finishing touches included a wood towel holder and hooks, a round mirror, custom-made indirect lighting, vessel sink, and wood bath mat.
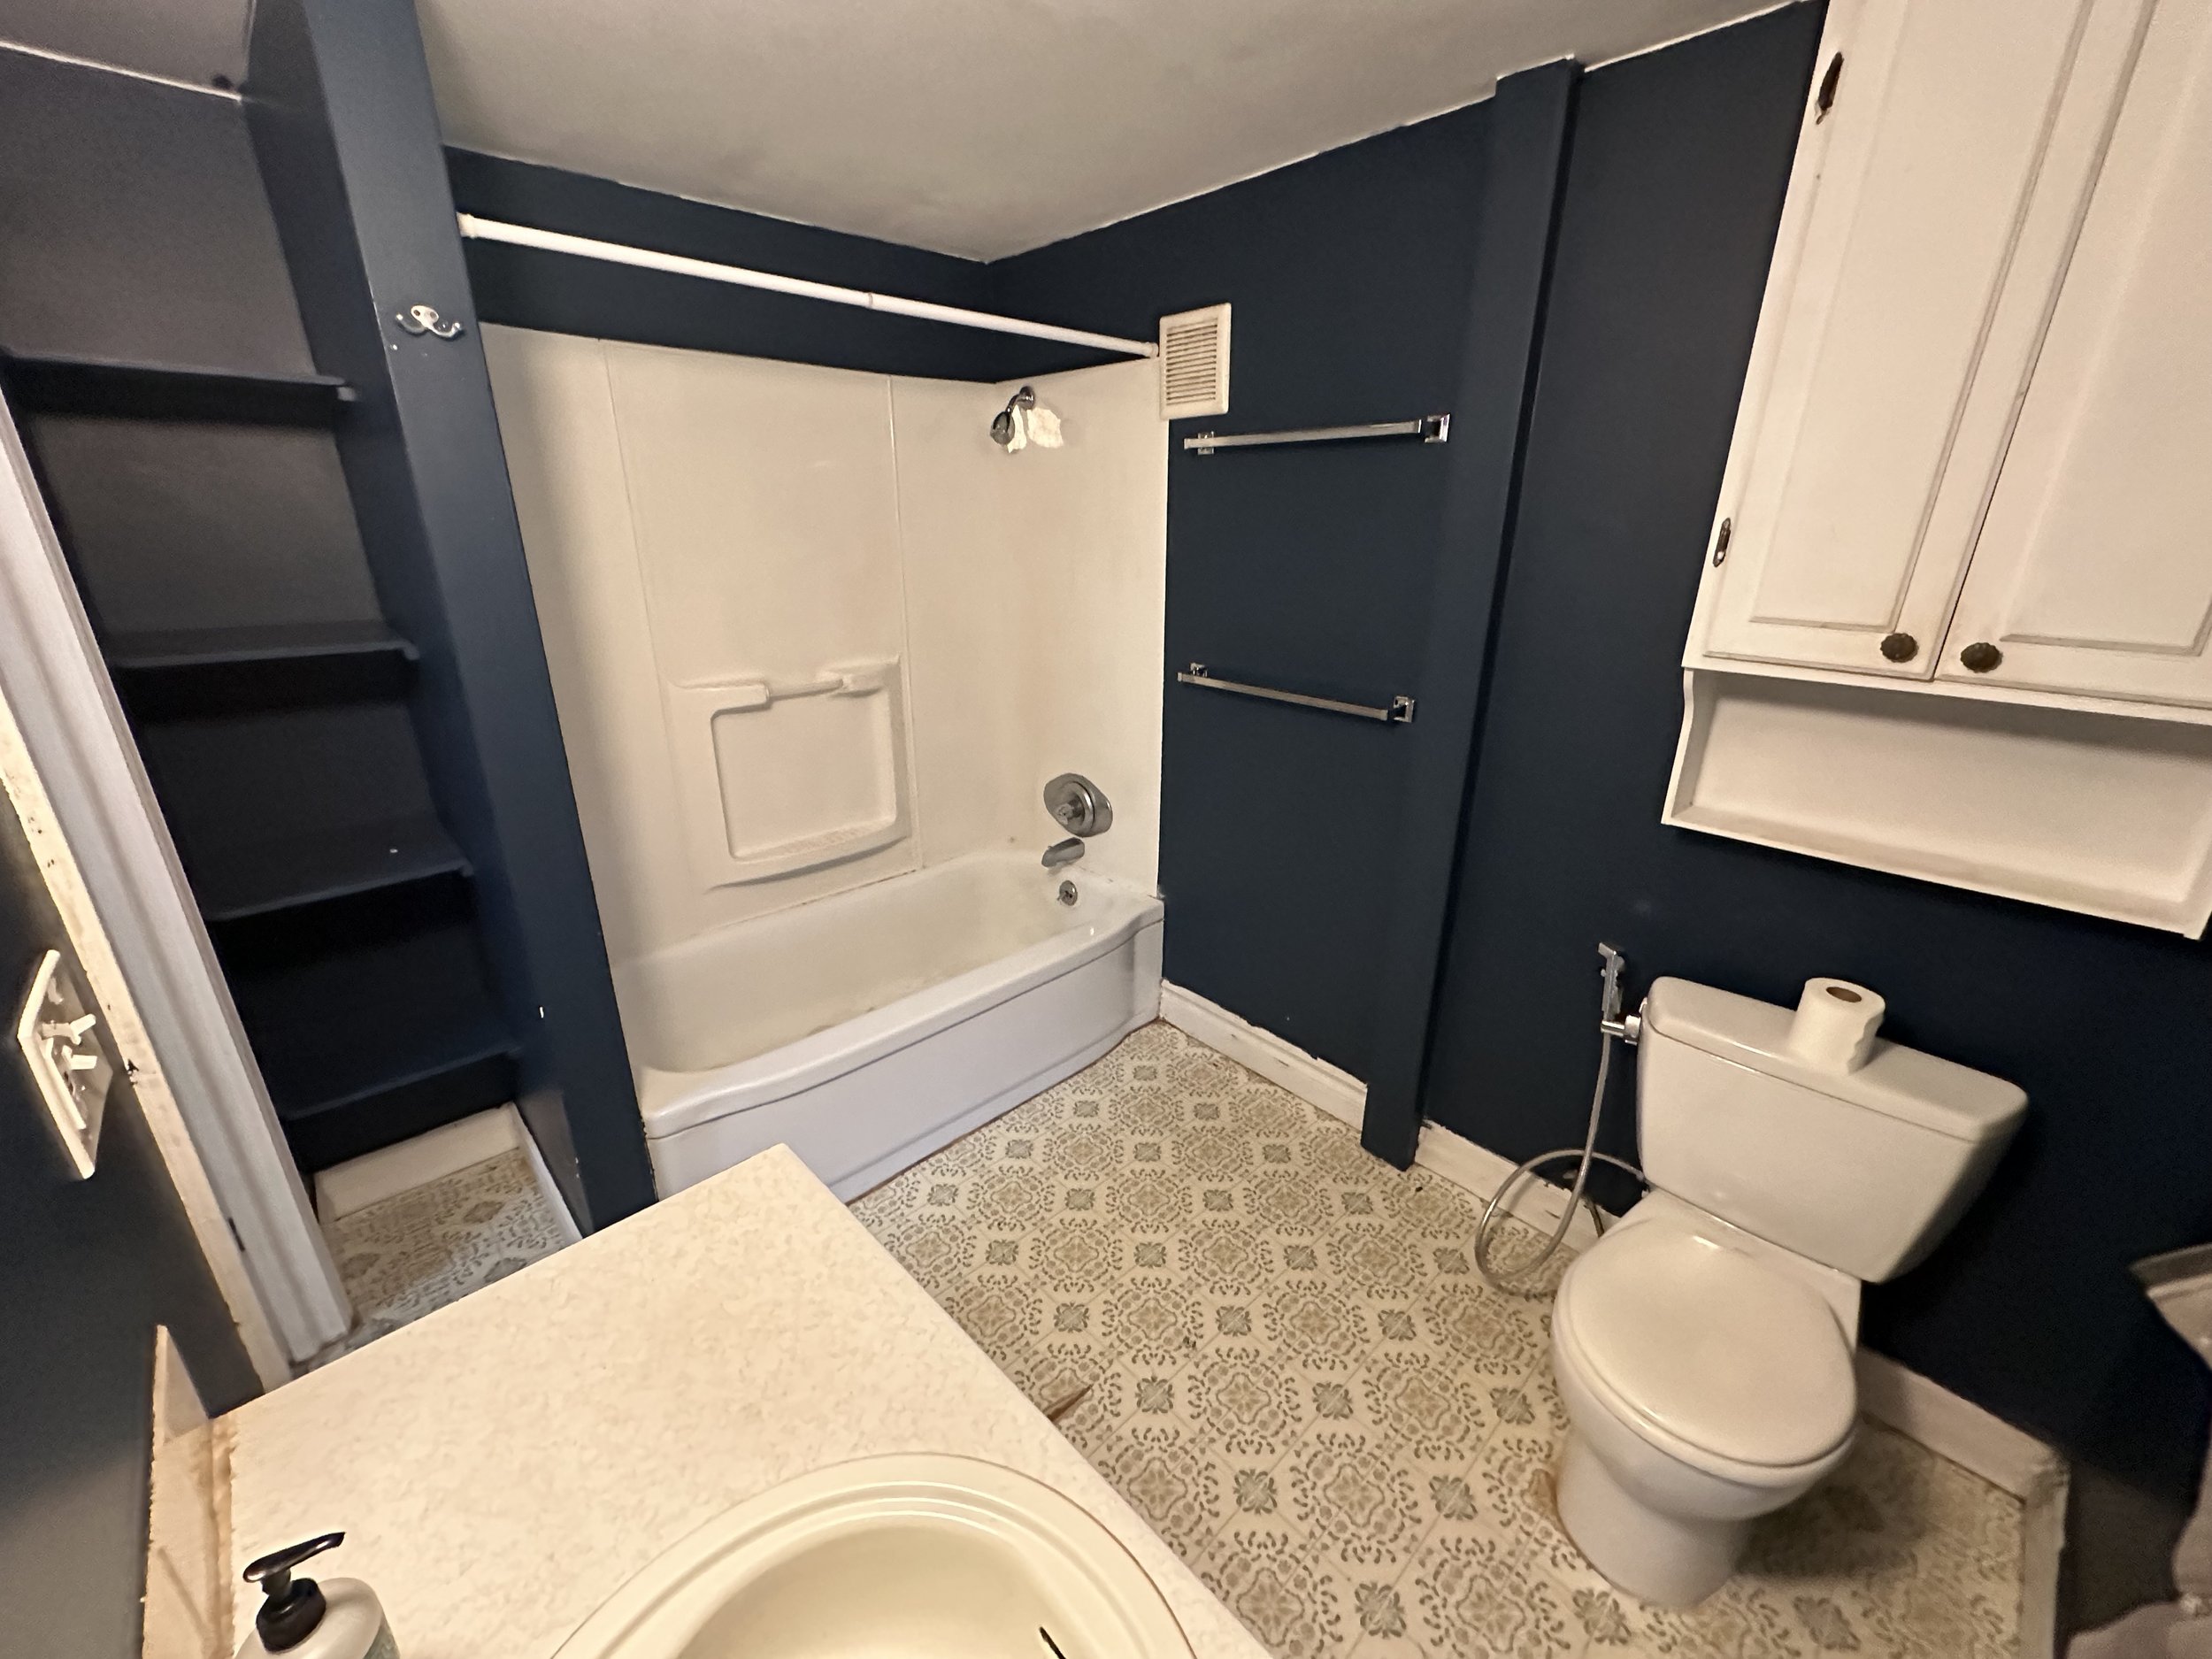
Before, wide shot of the bathroom. The toilet stayed in the same location, but the shower will become bigger and the vanity will move to the opposite wall.
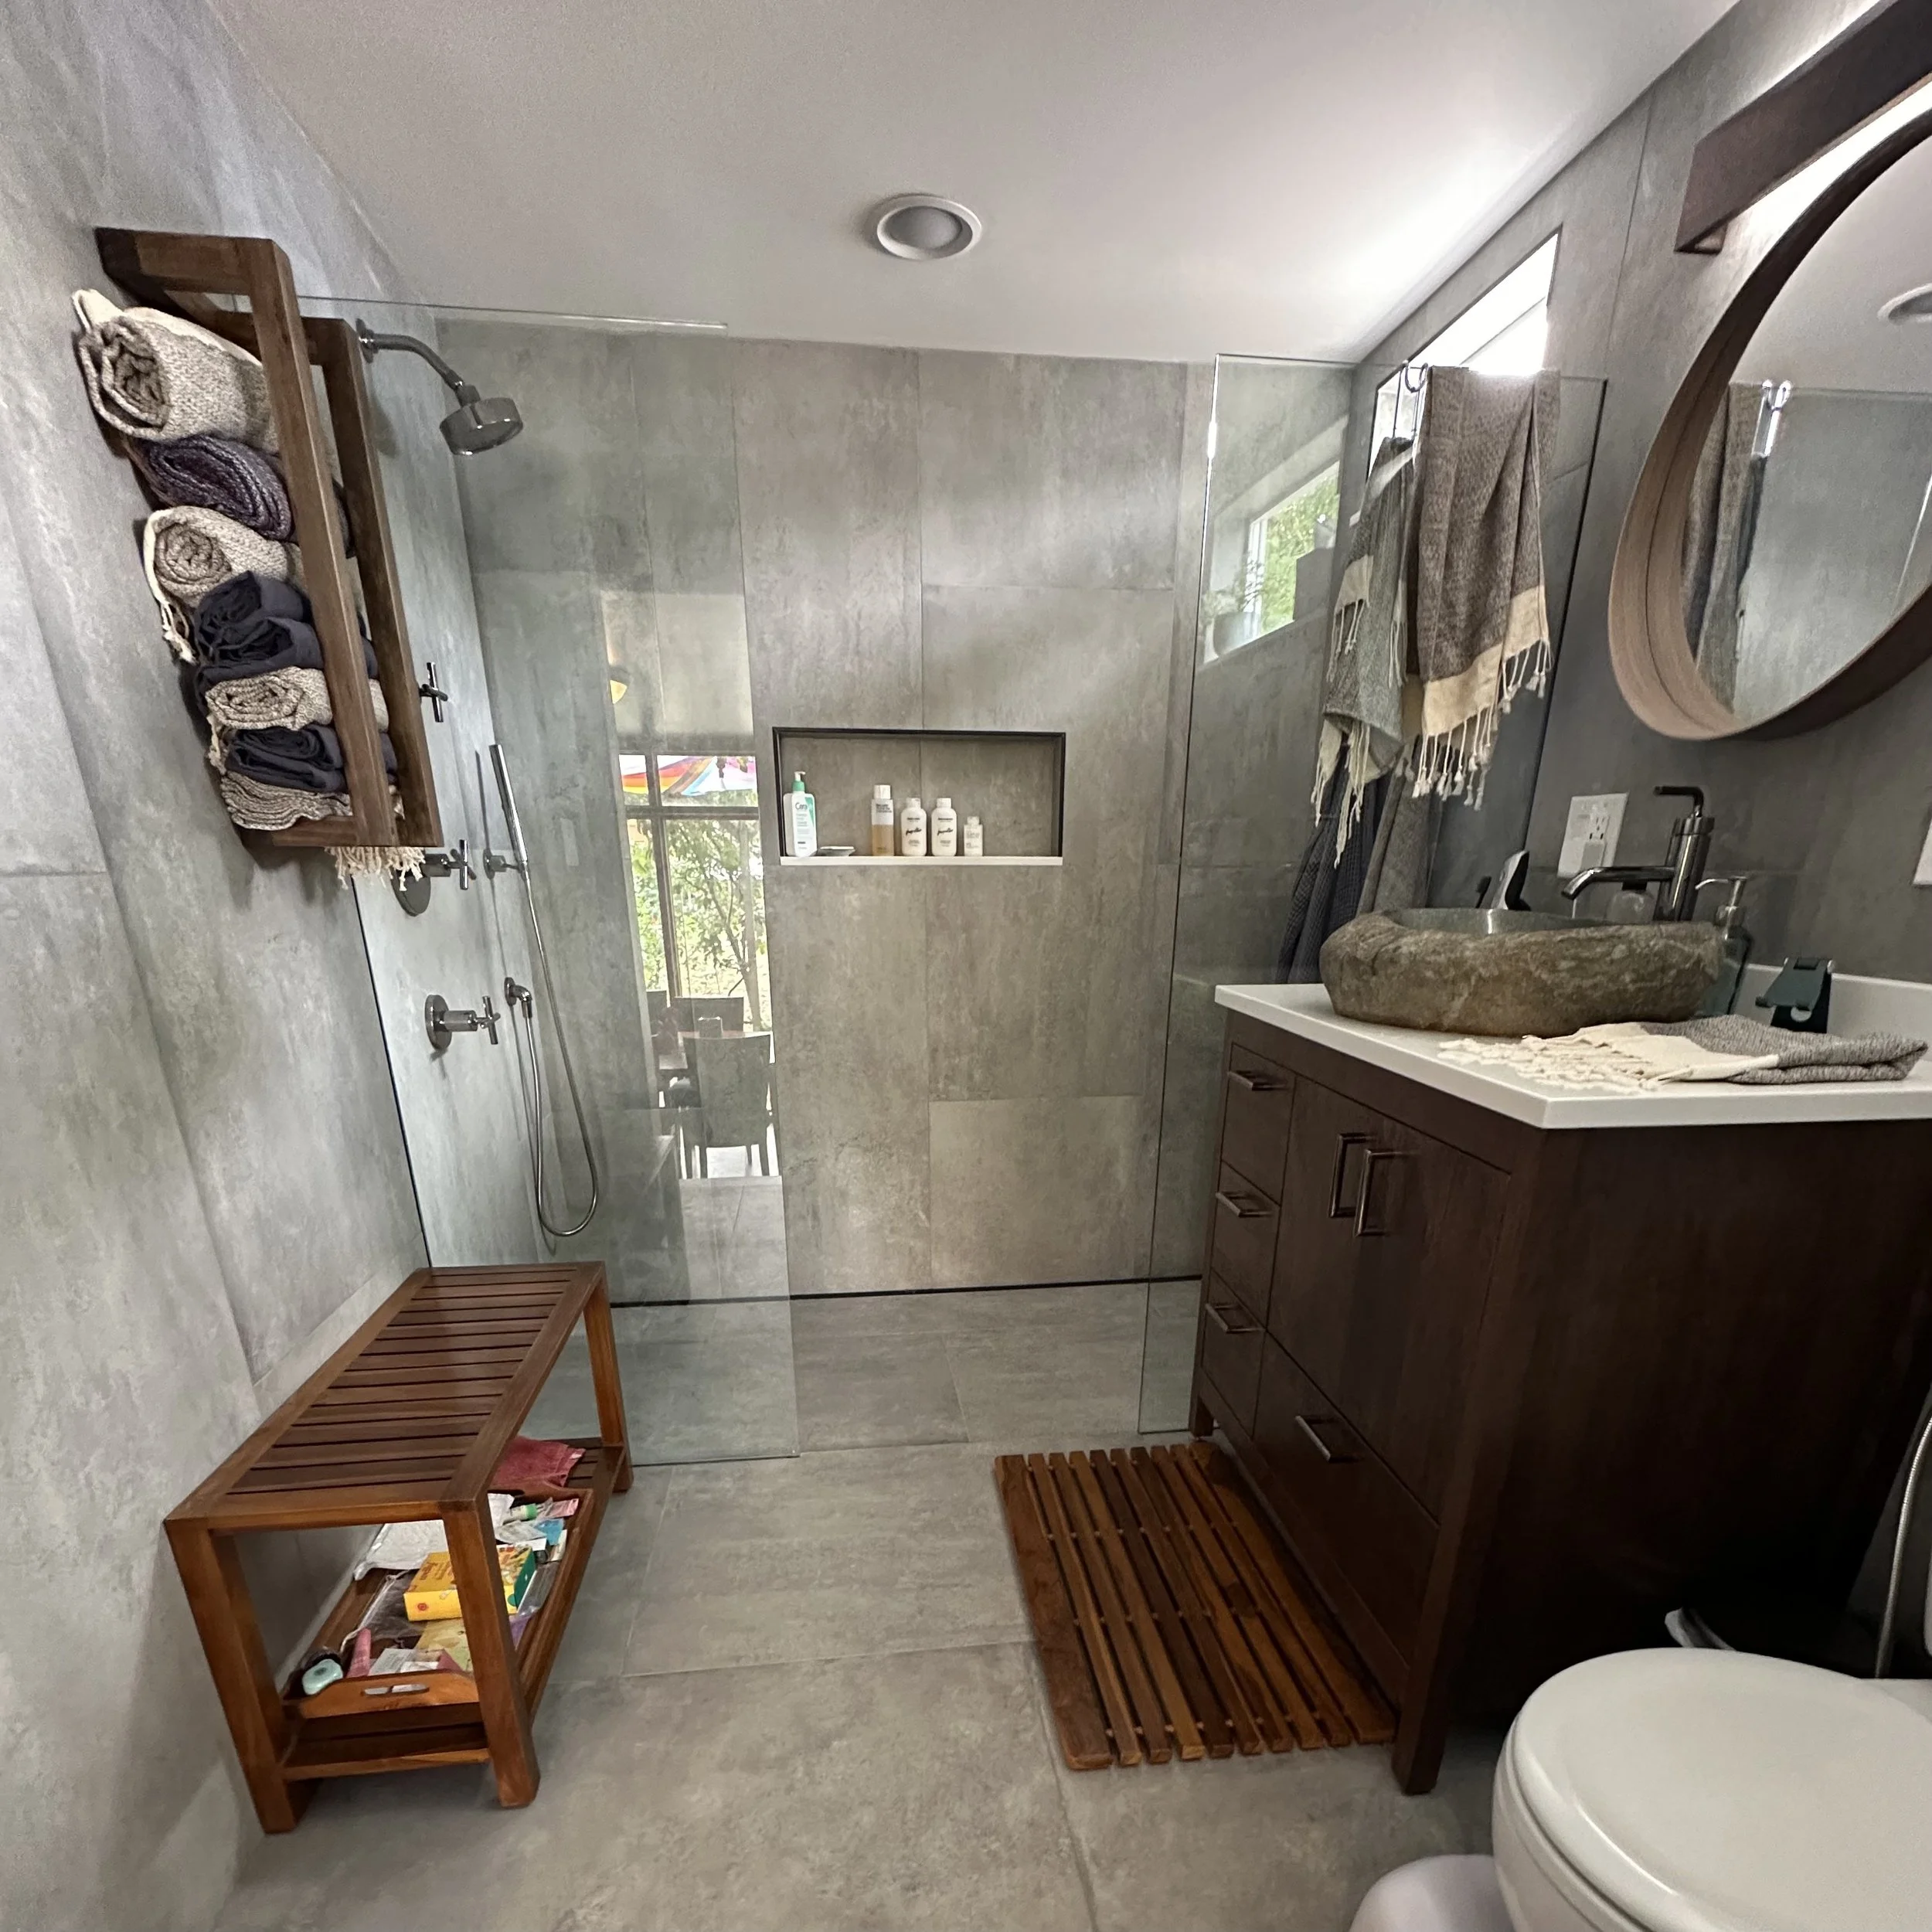
After. Full width shower, new door and vanity locations, fully waterproof bathroom from floor to ceiling.
Satisfaction brought this cat back, because this bathroom is beautiful and Percy loved it. If you are looking to makeover your litter-box, you can send me a note on the contact page.
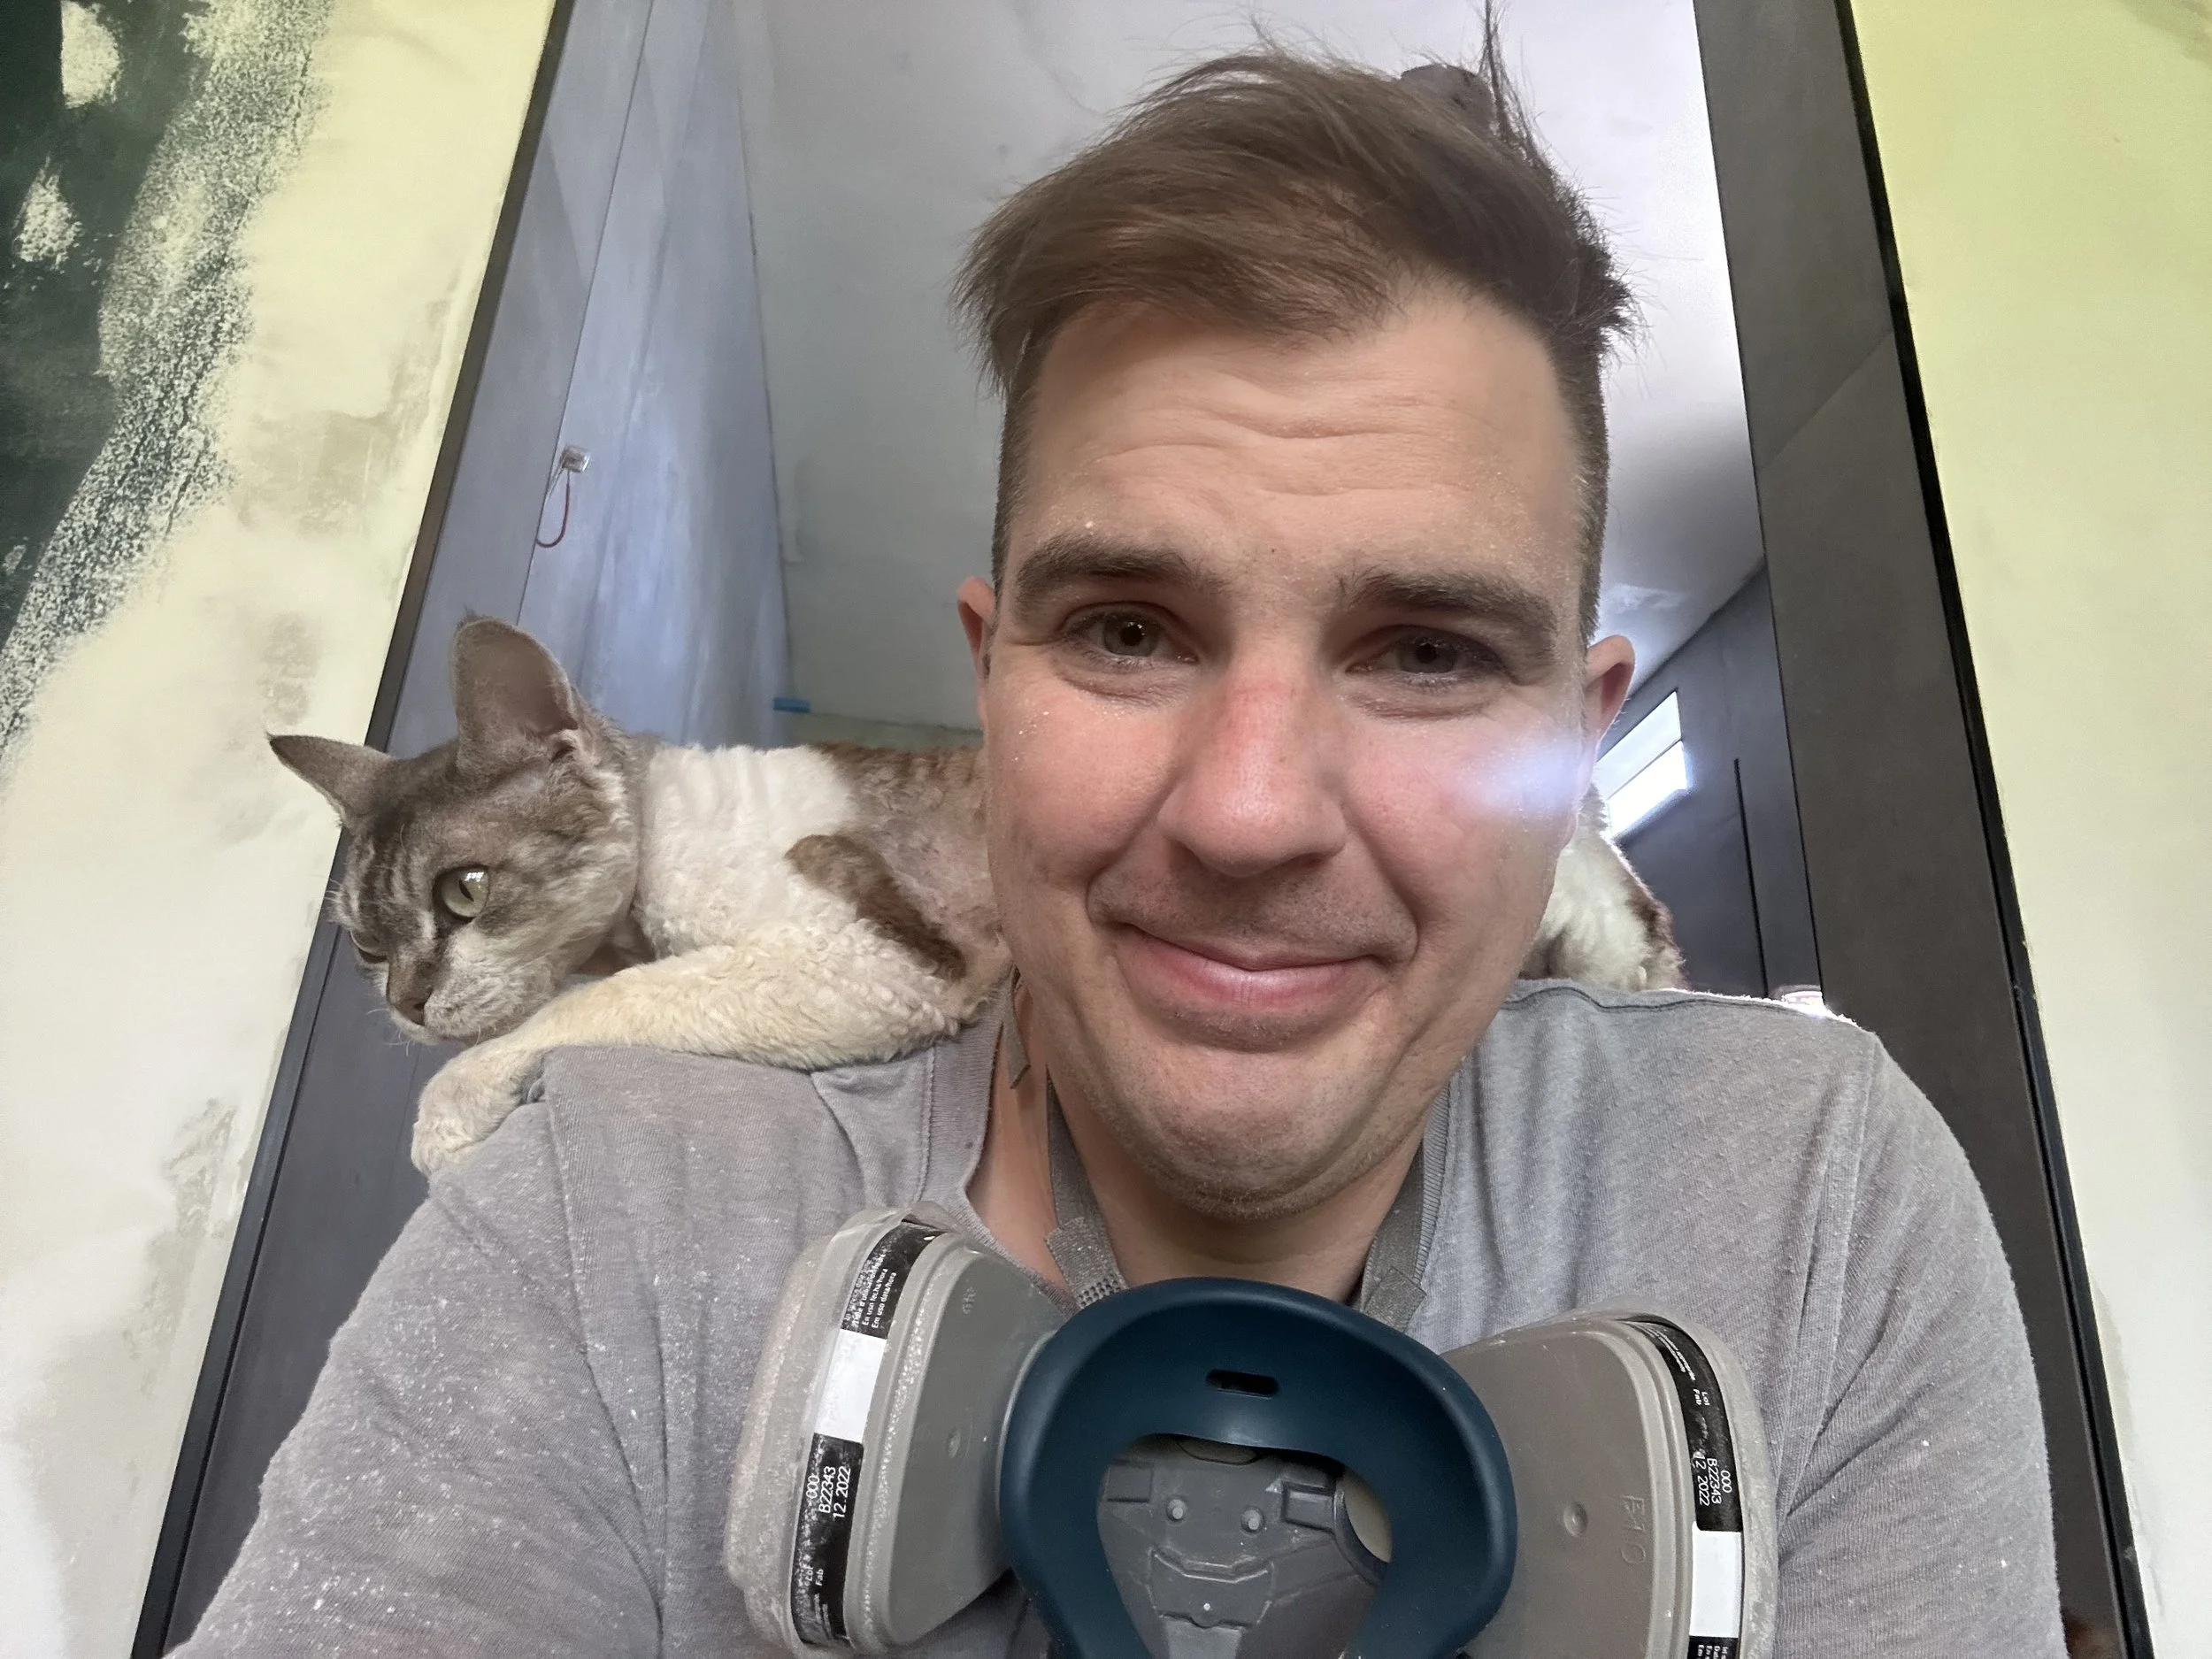
Me and Percy. This cat loves me.

Before. From inside the shower facing the old window.
After. Inside the shower facing the new door.
*Ok, so full disclosure, the cat was not my client, but I was instead working for the human that cohabitated with this cat, who was very kind, friendly, and a joy to work with. So was Percy actually, a delight, albeit with sharp claws. Sorry for the Shyamalan style twist you weren’t expecting.